April 16, 2019
Implement public key pinning in Swift using TrustKit

In this tutorial, you’ll learn how to secure your application by validating the certificate used for communication between your app and the server. The pinning process means you are binding the public key of your server’s SSL certificate to your application and do the key validation for every request you’re sending. The advantage of using the public key pinning is you don’t have to release new versions every time the certificate has been renewed because the public key remains unchanged and you only have to set up the security method once during development. In this part, we’re only going to cover the most simple case where the server doesn’t use any advanced security enhancements such as key rotation.
By using this solution you can detect a set of compromised certificates and stop the communication between your app and the malicious server although the pinning doesn’t save you from leaked private keys in your chain-of-trust. For more information about how the pinning work please visit the following website.
Why should you use TrustKit?
Configuring the pinning manually can be a difficult and time-consuming task also there’s always a chance of making mistakes. TrusKit provides a straightforward and easy way to validate the certificate’s public key by only typing a couple of lines of code and also it provides extra functionalities like reporting or fallback public keys.
Extracting the public key of the certificate
The first step of achieving the pinning is to download the actual certificate used by your server:
openssl s_client -showcerts -connect brainsandbeards.com:443 < /dev/null | openssl x509 -outform DER > certificate.cer
once the downloading is completed, make sure you convert it for the right format accepted by TrustKit:
openssl x509 -inform der -in certificate.cer -out certificate.pem
And finally there’s a python script available in TrustKit, which extracts the public key for the pinning:
python get_pin_from_certificate.py certificate.pem
I used Google’s certificate for testing purposes, your result should look similar to this:
CERTIFICATE INFO
----------------
b'subject= /OU=Domain Control Validated/CN=*.netlify.com\nissuer= /C=BE/O=GlobalSign nv-sa/CN=AlphaSSL CA - SHA256 - G2\nSHA1 Fingerprint=48:EF:E5:5E:54:A3:D2:5C:35:E3:C1:B0:10:1B:9C:A2:B1:A7:10:17\n'
TRUSTKIT CONFIGURATION
----------------------
kTSKPublicKeyHashes: @[@"b'Eo1yC4g87n1ipYiZg/pEq1Ahe/4JqtcnKwiaEmDP98w='"] // You will also need to configure a backup pin
If you are interested in what those commands actually do in the background, please read the detailed description or alternatively you can use the certificate converter to get the pem file.
Setting up TrustKit
After you have acquired the public key you can set up TrustKit for your app. Fortunately, there’s an awesome getting started guide available, I’ll try to summarise the most important steps in this tutorial.
Installation
The easiest way of installing TrustKit is using Cocoapods by adding the following dependency:
pod 'TrustKit'
Configuring TrustKit
There are two ways of configuring TrustKit itself:
- Adding keys and values to info.plist file:
<key>TSKConfiguration</key><dict><key>TSKPinnedDomains</key><dict><key>myDomain.com</key><dict><key>TSKPublicKeyHashes</key><array><string>public key 1</string><string>public key 2</string></array><key>TSKPublicKeyAlgorithms</key><array><string>TSKAlgorithmRsa2048</string></array><key>TSKIncludeSubdomains</key><true/><key>TSKEnforcePinning</key><true/></dict></dict></dict>
There are two mandatory keys you have to provide for the configuration: kTSKPublicKeyAlgorithms and kTSKPublicKeyHashes. The algorithm specifies the encoding method of the public key and the hashes define the hashed version of the public key. All of that information is available from the certificate during the public key extraction process. It’s important that you provide at least two hashes for the pinning to make sure your application still works properly if there are some issues with the main cert. It’s also highly advised that you request the backup certificate from a different issuer for safety reasons and it should be on a new chain-of-trust as well.
You can also provide the kTSKEnforcePinning key if you would like to block the communication for the specific domain in case the key validation fails and also kTSKIncludeSubdomainsif you would like to extend the public key checking for the subdomains too. The list of available keys and values can be found here.
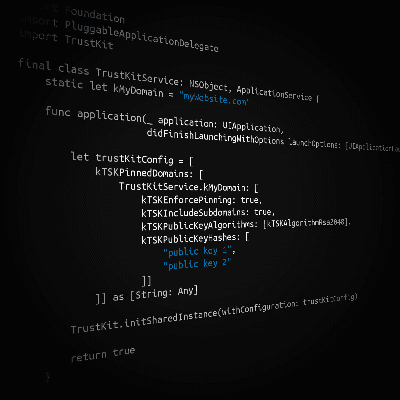
- You can add the same keys and values by code as well:
import Foundationimport PluggableApplicationDelegateimport TrustKitfinal class TrustKitService: NSObject, ApplicationService {static let kMyDomain = "myWebsite.com"func application(_ application: UIApplication,didFinishLaunchingWithOptions launchOptions: [UIApplicationLaunchOptionsKey: Any]? = nil) -> Bool {let trustKitConfig = [kTSKPinnedDomains: [TrustKitService.kMyDomain: [kTSKEnforcePinning: true,kTSKIncludeSubdomains: true,kTSKPublicKeyAlgorithms: [kTSKAlgorithmRsa2048],kTSKPublicKeyHashes: ["public key 1","public key 2"]]]] as [String: Any]TrustKit.initSharedInstance(withConfiguration: trustKitConfig)return true}}
In the example above I used PluggableApplicationDelegate to lightweight the AppDelegate and separate TrustKit service.
Validating public key
If you have set up the configuration for TrustKit properly, you can easily do the key validation by using PinnigValidator and URLSessionDelegate:
static func isServerCertValid(_ challenge: URLAuthenticationChallenge) -> Bool {guard let serverTrust = challenge.protectionSpace.serverTrust else {return false}let pinningValidator = TrustKit.sharedInstance().pinningValidatorlet trustDecision = pinningValidator.evaluateTrust(serverTrust, forHostname: "myWebsite.com")return trustDecision == .shouldAllowConnection}
Using TrustKit with web views
If you’re using WKWebViews, you can use the authentication challenge delegate method and the same PinnigValidator.
Testing the validation
The easiest way of testing if your public key validation is working is by using Charles Proxy which works as a middleman between your application and your server and intercepts the sent requests. By default, it uses a self-signed, untrusted certificate for SSL communication which means as soon as you start the traffic monitoring with Charles, the public key validation should immediately fail in your application.
The other option for testing is to manually modify the hashes in your config file or code and check the result of the validation callback.
What’s next?
Make sure you are following Brains & Beards for weekly mobile application development related content because we always like to share our findings with the community and dig into the latest technologies.
Want more?
If you liked this post, why don't you subscribe for more content? If you're as old-school as we are, you can just grab the RSS feed of this blog. Or enroll to the course described below!
Alternatively, if audio's more your thing why don't you subscribe to our podcast! We're still figuring out what it's going to be, but already quite a few episodes are waiting for you to check them out.


