February 19, 2019
Bottom Navigation with a List Screen in Flutter

Hello folks, I’ve come back to you after a few weeks away. While I was away, I had some time to tinker with Flutter. In this quick tutorial, I want to show you how to set up a Flutter app with bottom navigation and a scrolling card list.
Creating a Flutter app
If this is your first time playing with Flutter, I recommend you prepare your development environment and setup a basic Flutter project first. The following material will help:
- Official Flutter Documentation
- Creating your first Flutter project using WebStorm by Brains & Beards
Adding bottom navigation in Flutter
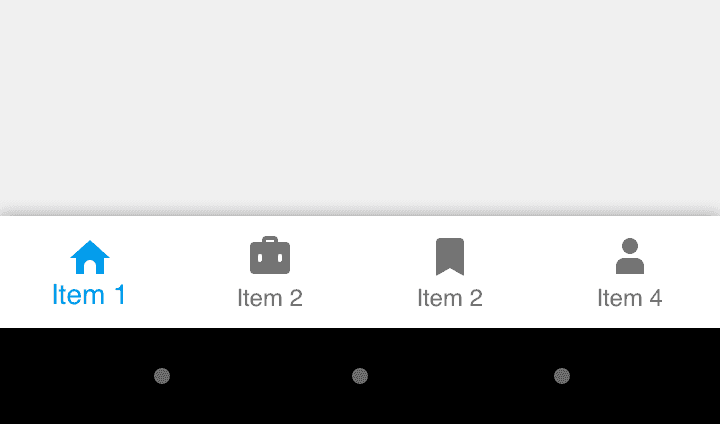
Using the material.dart package for Flutter, we get a Material Design bottom navigation widget, called bottomNavigationBar.

Let’s create a widget that uses the bottomNavigationBar widget. In lib/screens, add a folder called home and inside this folder create a file called home_screen.dart. Here is the code that I placed in the file we created. It contains three items in the bottom navigation tab.
import 'package:flutter/material.dart';import 'package:flutter/widgets.dart';class HomePage extends StatefulWidget {HomePage({Key key}) : super(key: key);@overrideHomePageState createState() => HomePageState();}class HomePageState extends State<HomePage> {int selectedIndex = 0;final widgetOptions = [Text('Beer List'),Text('Add new beer'),Text('Favourites'),];@overrideWidget build(BuildContext context) {return Scaffold(appBar: AppBar(title: Text('Beer App'),),body: Center(child: widgetOptions.elementAt(selectedIndex),),bottomNavigationBar: BottomNavigationBar(items: <BottomNavigationBarItem>[BottomNavigationBarItem(icon: Icon(Icons.local_drink), title: Text('Beers')),BottomNavigationBarItem(icon: Icon(Icons.add_a_photo), title: Text('New Beer')),BottomNavigationBarItem(icon: Icon(Icons.favorite), title: Text('Favourites')),],currentIndex: selectedIndex,fixedColor: Colors.deepPurple,onTap: onItemTapped,),);}void onItemTapped(int index) {setState(() {selectedIndex = index;});}}
Let’s briefly explain how this works:
selectedIndex — keeps value of the current index
widgetOptions — is an array which contains references for the content per bottom navigation item. At the moment, we have just declared text, which means on every selected item in bottom navigation you will see just text. Later on in this article, I will show you how to create a list that will be displayed when pressing on a particular navigation item.
In the build method, I declared body with the current selected index from widgetOptions and I also added the most important part, which is the bottomNavigationBar widget. We’ve included three items, which are BottomNavigationBarItem widgets. Each item has an icon and text label. BottomNavigationBar accepts a property onTap. This property defines the callback function for handling a press. In our case, it switches selectedIndex for the value that has been tapped.
Okay, now copy this code to your file. Don’t forget to edit main.dart, and include the HomePage widget. Compile the project and your bottom navigation is done.
import 'package:Liquorie/screens/home/home_screen.dart';import 'package:flutter/material.dart';void main() => runApp(MyApp());class MyApp extends StatelessWidget {@overrideWidget build(BuildContext context) {return MaterialApp(title: 'Liquorie',theme: ThemeData(primarySwatch: Colors.blue,),home: HomePage());}}

Adding a scrollable list to a Flutter app
Okay, so now we have the bottom navigation working, it’s time to add a list. In my application, I want to show a list of beers. I’ve gone ahead and created a simple JSON file to store the data.
Create an assets folder in the main catalogue and add the file beers.json.
[
  {
    "id": "d320a502-5371-4707-927f-d53ca36b972f0",
    "name": "Barcelona beer",
    "country": "Spain",
    "image": "https://www.barcelonabeercompany.com/archivos/beer-barcelona-beer_140716141755.jpg",
    "abv": "5%"
  },
  {
    "id": "d320a502-5371-4707-927f-d53ca36b972f1",
    "name": "Vitus",
    "country": "Germany",
    "image": "https://beerconnoisseur.com/sites/default/files/styles/beer_page_245w/public/beer/weihenstephaner-vitus.jpg?itok=4-DBApPE",
    "abv": "7.7%"
  },
  {
    "id": "d320a502-5371-4707-927f-d53ca36b972f2",
    "name": "PINTA A Nanasy?",
    "country": "Poland",
    "image": "http://www.browarpinta.pl/zdjecia/piwa/thumbs/cache/pinta-a-nanasy-bottle-file-for-internet-300x0-t.jpg",
    "abv": "7.1%"
  },
  {
    "id": "d320a502-5371-4707-927f-d53ca36b972f3",
    "name": "Peroni",
    "country": "Italy",
    "image": "https://products2.imgix.drizly.com/ci-peroni-53f07a33cdc3cae4.png?auto=format%2Ccompress&dpr=2&fm=jpeg&h=240&q=20",
    "abv": "5.1%"
  },
  {
    "id": "d320a502-5371-4707-927f-d53ca36b972f4",
    "name": "HORIZONT Japán Búza beer",
    "country": "Hungary",
    "image": "https://res.cloudinary.com/ratebeer/image/upload/w_152,h_309,c_pad,d_beer_img_default.png,f_auto/beer_268255",
    "abv": "5.8%"
  }
]
In Flutter apps, an asset (or resource) can be bundled and deployed with your app. To add an asset to a Flutter app, it must be specified in the pubspec.yaml file, located at the root of your project.
Because our JSON file is a resource, we need to include it in pubspec.yaml. This can be done like so:
  assets:
    - assets/beers.json
Okay, now we need to add the beer list to one of our screens. In screens, create a folder called beer_list and inside create a file called beer_list.dart. To build list we use ListView widget.
return new ListView.builder(itemBuilder: (BuildContext context, int index) {var beer = beers[index];return new Card(child: new Column(crossAxisAlignment: CrossAxisAlignment.stretch,children: <Widget>[new Text("Name: " + beer['name'],style: TextStyle(fontWeight: FontWeight.bold, fontSize: 24)),new Text("Country: " + beer['country'],style: TextStyle(fontWeight: FontWeight.normal, fontSize: 20)),new Text("ABV: " + beer['abv'],style: TextStyle(fontWeight: FontWeight.normal, fontSize: 20)),new Image.network(beer['image'], height: 200)],),margin: EdgeInsets.only(top: 10, bottom: 10, left: 10, right: 10));},itemCount: beers == null ? 0 : beers.length,);
ListView widget displays beers list. I use few widgets to show data for every list item: Card, Column, Text and Image.
ListView has two main properties:
itemBuilder —where we specify what to render.
itemCount— where we pass the number of elements.
To load the data from the JSON file, we use DefaultAssetBundle. We then have to decode the data from a JSON format. It’s asynchronous code so to handle it we use the FutureBuilder widget.
The FutureBuilder widget is essentially a widget that returns another widget based on the result of a Future’s execution. The builder callback defines the strategy for what is rendered based on the information in the snapshot from the asynchronous computation (Future). You can read more about the FutureBuilder API here.
child: new FutureBuilder(future:DefaultAssetBundle.of(context).loadString('assets/beers.json'),builder: (context, snapshot) {var beers = json.decode(snapshot.data.toString());
Here you have the entire code:
import 'dart:convert';import 'package:flutter/material.dart';import 'package:flutter/foundation.dart';class BeerListPage extends StatefulWidget {BeerListPage({Key key}) : super(key: key);@overrideBeerListPageState createState() => BeerListPageState();}class BeerListPageState extends State<BeerListPage> {@overrideWidget build(BuildContext context) {return Scaffold(body: new Container(child: new Center(child: new FutureBuilder(future:DefaultAssetBundle.of(context).loadString('assets/beers.json'),builder: (context, snapshot) {var beers = json.decode(snapshot.data.toString());return new ListView.builder(itemBuilder: (BuildContext context, int index) {var beer = beers[index];return new Card(child: new Column(crossAxisAlignment: CrossAxisAlignment.stretch,children: <Widget>[new Text("Name: " + beer['name'],style: TextStyle(fontWeight: FontWeight.bold, fontSize: 24)),new Text("Country: " + beer['country'],style: TextStyle(fontWeight: FontWeight.normal, fontSize: 20)),new Text("ABV: " + beer['abv'],style: TextStyle(fontWeight: FontWeight.normal, fontSize: 20)),new Image.network(beer['image'], height: 200)],),);},itemCount: beers == null ? 0 : beers.length,);}),),));}}
Okay, now we just need to add a reference to your list in the HomeScreen widget I created in the first part of this tutorial.
final widgetOptions = [new BeerListPage(),Text('Add new beer'),Text('Favourites'),];
Rebuild and here is the result:

Summary
Hopefully by now, you’ve set up a simple Flutter app with bottom navigation and a scrolling list view. To summarise everything, we demonstrated how to handle state with the BottomNavigationBar widget. We provided an example for asynchronously rendering a ListView using the FutureBuilder API. And, you should now be familiar with loading assets into your Flutter app using pubspec.yaml and the DefaultAssetBundle API.
If you like our tutorials, please check out our blog. We’ve just fallen in love with Flutter at Brains and Beards. Stay tuned, our next Flutter tutorial is coming soon 🐺.
If you like our Flutter tutorials, here are some more interesting articles to read:
How to add redux-persist to flutter app
Want more?
If you liked this post, why don't you subscribe for more content? If you're as old-school as we are, you can just grab the RSS feed of this blog. Or enroll to the course described below!
Alternatively, if audio's more your thing why don't you subscribe to our podcast! We're still figuring out what it's going to be, but already quite a few episodes are waiting for you to check them out.


