January 03, 2019
Part 4 — Implementing authentication and integrating with Apollo Client


Thanks for checking-in to part four of my blog series Getting Started with GraphQL and React Native. This will be the last post in this series. I’m going to be walking through how you can implement authentication with GraphQL, and integrate the sign-up and login functionality in a React Native application.
Server-Side
First of all, we need to create a User data model user in datamodel.graphql, the User type has an id, name, password and an array of dogs.
type Dog {id: ID! @uniquename: String!type: String!}type User {id: ID! @uniquename: String!password: String!dogs: [Dog!]!}
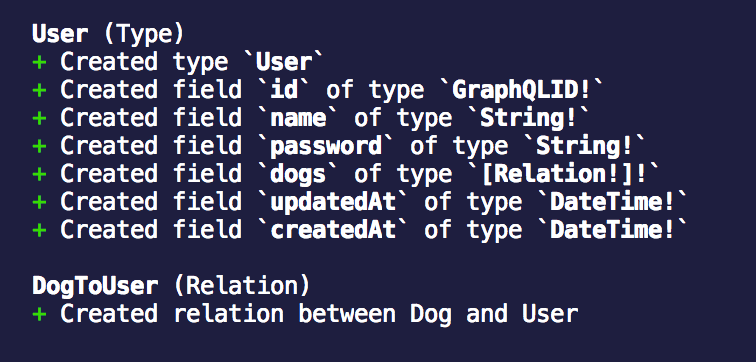
Run the following command to deploy the new schema changes:
$ prisma deploy
You should see a similar result to the following:
When we have User model now we can add a type for represents a user with token, I named it AuthPayload:
We now need to create an AuthPayload type. This represents the data payload that will be returned upon successfully signing-up or logging-in.
type Dog {id: ID! @uniquename: String!type: String!}type User {id: ID! @uniquename: String!password: String!dogs: [Dog!]!}type AuthPayload {user: Usertoken: String}
Remember to run prisma deploy after making a change to datamodel.graphql.
For authentication, we will use a JSON Web Token. Add the following NPM libraries:
$ yarn add jsonwebtoken bcryptjs
Now we need to create the mutations for signing-up and logging-in. I will create a new file for it, because there is quite a lot of code and it is better to keep mutations in a separate file. Add a file called Mutations.js in the src directory.
const APP_SECRET = "abcdefghijklmnopqrst";const bcrypt = require("bcryptjs");const jwt = require("jsonwebtoken");signUp = async (_object, args, context, _information) => {const password = await bcrypt.hash(args.password, 10);const user = await context.db.mutation.createUser({data: { ...args, password },},`{ id }`);const token = jwt.sign({ userId: user.id }, APP_SECRET);return {token,user,};};login = async (_object, args, context, _information) => {const user = await context.db.query.user({ where: { email: args.email } },` { id password } `);if (!user) {throw new Error("User not found");}const valid = await bcrypt.compare(args.password, user.password);if (!valid) {throw new Error("Sorry, Wrong password");}const token = jwt.sign({ userId: user.id }, APP_SECRET);return {token,user,};};dog = (root, args, context, queryInfo) => {return context.db.mutation.createDog({data: {type: args.type,name: args.name,},},queryInfo);};module.exports = {signUp,login,dog,};
The file contains three function: do (created in the previous tutorial), login and signUp. The login and sign-up functions are resolvers for handling, you guessed it, logging-in and signing-up mutations. We’re using bcrypt to hash and compare passwords, while the jwt library is used to sign a JWT. Update the index.js file with a reference to Mutations.js:
const Mutation = require("./Mutations");const resolvers = {Query: {dogName: () => `Tommy the chihuahua`,dogs: (root, args, context, queryInfo) => {return context.db.query.dogs({}, queryInfo);},user: (root, args, context, info) => {return context.db.query.user({ where: { id: root.user.id } }, info);},},Mutation,};
Please note this tutorial won’t go into detail about checking the JSON Web Token on subsequent requests to the GraphQL Server. Ideally, you’ll want to verify the token and make a decision based on the validity of the token. This can be done using authentication middleware for your GraphQL Server, e.g. Passport.js
To use your custom mutations, graphql-yoga recommends Heroku, so we’ll go with that. You can find step-by-step instructions on how to do this here.
Remember to commit all of your changes because Heroku will deploy everything on the current branch.
Visit the playground after deploying to Heroku:

When you click Schema on the right, you should see your custom mutations listed. Okay, next let’s add authentication logic to the React Native application.
Client-Side
I’ve refactored App.js and created new files called DogsScreen.js and LoginScreen.js. The LoginScreen.js file contains form inputs and handlers for logging-in and signing-up.
import React, { Component } from "react";import { StyleSheet, View, ScrollView } from "react-native";import { LoginScreen } from "./LoginScreen";import { DogsScreen } from "./DogsScreen";export default class App extends Component {render() {return (<ScrollView style={styles.scroll}><View style={styles.container}><LoginScreen /><DogsScreen /></View></ScrollView>);}}const styles = StyleSheet.create({scroll: {flex: 1,marginTop: 40,},container: {flex: 1,justifyContent: "center",alignItems: "center",backgroundColor: "#F5FCFF",},});
App.js
The DogsScreen.js file is detailed explained in more detail here.
import React, { Component } from "react";import { StyleSheet, Text, View, Button, Modal, TextInput } from "react-native";import { ApolloClient, HttpLink, InMemoryCache } from "apollo-boost";import { ApolloProvider, graphql, Mutation } from "react-apollo";import gql from "graphql-tag";const client = new ApolloClient({link: new HttpLink({uri: "https://eu1.prisma.sh/natalia-majkowska/dogs-service/dev",headers: {authorization: "YOUR_TOKEN", // on production you need to store token in storage or in redux persist, for demonstration purposes we do this like that},}),cache: new InMemoryCache(),});const dogQuery = gql`query {dogs {nametype}}`;const addDog = gql`mutation addDog($type: String!, $name: String!) {createDog(data: { type: $type, name: $name }) {id}}`;const DogComponent = graphql(dogQuery)((props) => {const { error, dogs } = props.data;if (error) {return <Text>{error}</Text>;}if (dogs) {return (<View>{dogs.map((dog) => {return <Text key={dog.name}>{dog.name}</Text>;})}</View>);}return <Text>Loading...</Text>;});export class DogsScreen extends Component {state = {name: "",type: "",};render() {return (<ApolloProvider client={client}><View style={styles.container}><Mutation mutation={addDog} refetchQueries={[{ query: dogQuery }]}>{(addDogMutation, { data }) => (<View><Text style={styles.welcome}>Dogs data:</Text><TextInputstyle={styles.input}onChangeText={(text) => this.setState({ name: text })}value={this.state.name}placeholder="name"/><TextInputstyle={styles.input}onChangeText={(text) => this.setState({ type: text })}value={this.state.type}placeholder="type"/><ButtononPress={() => {addDogMutation({variables: {type: this.state.type,name: this.state.name,},}).then((res) => res).catch((err) => <Text>{err}</Text>);this.setState({ type: "", name: "" });}}title="Add dog"/></View>)}</Mutation><Text style={styles.welcome}>My dogs:</Text><DogComponent /></View></ApolloProvider>);}}const styles = StyleSheet.create({container: {flex: 1,justifyContent: "center",alignItems: "center",backgroundColor: "#F5FCFF",},welcome: {fontSize: 20,textAlign: "center",margin: 10,},input: {height: 30,width: 150,borderColor: "gray",borderWidth: 1,marginTop: 5,padding: 1,},});
DogsScreen
And now, the most important part, LoginScreen.js. As you can see, I have a new instance of ApolloClient with my Heroku URL. I also added the mutations for signUp and login, which have similar arguments to their server-side equivalents. The rest is very similar to DogsScreen. I’ve added some state to demonstrate a successful sign-up and login.
If you’re not sure how we’ve set up the mutations, you can refer back to the previous tutorial here.
import React, { Component } from "react";import { StyleSheet, Text, View, Button, TextInput } from "react-native";import { ApolloClient, HttpLink, InMemoryCache } from "apollo-boost";import { ApolloProvider, Mutation } from "react-apollo";import gql from "graphql-tag";const client = new ApolloClient({link: new HttpLink({uri: "https://mysterious-harbor-82544.herokuapp.com",}),cache: new InMemoryCache(),});const signUp = gql`mutation signUp($name: String!, $email: String!, $password: String!) {signUp(name: $name, email: $email, password: $password) {tokenuser {id}}}`;const login = gql`mutation login($email: String!, $password: String!) {login(email: $email, password: $password) {token}}`;export class LoginScreen extends Component {state = {password: "",name: "",email: "",resultRegister: "",resultLogin: "",};render() {return (<ApolloProvider client={client}><View style={styles.container}><Mutation mutation={signUp}>{(signUpMutation, { data }) => (<View><Text style={styles.welcome}>Register user:</Text><TextInputstyle={styles.input}onChangeText={(text) => this.setState({ name: text })}value={this.state.name}placeholder="name"/><TextInputstyle={styles.input}onChangeText={(text) => this.setState({ email: text })}value={this.state.type}placeholder="email"/><TextInputstyle={styles.input}onChangeText={(text) => this.setState({ password: text })}value={this.state.type}secureTextEntry={true}placeholder="password"/><ButtononPress={() => {signUpMutation({variables: {email: this.state.email,name: this.state.name,password: this.state.password,},}).then((res) => {console.log("LoginScreen -> res.data.login.token",res.data.signUp.token);this.setState({resultRegister: "SUCCESS",});return res;}).catch((err) => <Text>{err}</Text>);}}title="Register user"/><Text>{this.state.resultRegister}</Text></View>)}</Mutation><Mutation mutation={login}>{(loginMutation, { data }) => (<View><Text style={styles.welcome}>Login user:</Text><TextInputstyle={styles.input}onChangeText={(text) => this.setState({ email: text })}value={this.state.type}placeholder="email"/><TextInputstyle={styles.input}onChangeText={(text) => this.setState({ password: text })}value={this.state.type}secureTextEntry={true}placeholder="password"/><ButtononPress={() => {loginMutation({variables: {email: this.state.email,password: this.state.password,},}).then((res) => {console.log("LoginScreen -> res.data.login.token",res.data.login.token);this.setState({resultLogin: "SUCCESS",});return res;}).catch((err) => {console.log("LoginScreen -> err", err);return <Text>{err}</Text>;});}}title="Login user"/><Text>{this.state.resultLogin}</Text></View>)}</Mutation></View></ApolloProvider>);}}const styles = StyleSheet.create({container: {flex: 1,justifyContent: "center",alignItems: "center",backgroundColor: "#F5FCFF",},welcome: {fontSize: 20,textAlign: "center",margin: 10,},input: {height: 30,width: 150,borderColor: "gray",borderWidth: 1,marginTop: 5,padding: 1,},});
Here is the completed application:
Thanks everyone for the journey over this past month. I hope you’ve enjoyed reading the posts as much as I’ve enjoyed writing them. Stay tuned for our next tutorial. We are preparing something very interesting. If you like our tutorials, please check our blog for other stories. Otherwise, if you’re keen on Prisma, GraphQL or React Native, check-out some of these tutorials below:
Tutorials for Prisma, GraphQL and React Native
https://brainsandbeards.com/blog/part-1-setting-up-a-graphql-server-with-prisma
https://brainsandbeards.com/blog/part-2-setting-up-apollo-client-in-a-react-native-app
https://brainsandbeards.com/blog/part-3-mutating-data-in-a-react-native-app-with-apollo-client
Source Code
https://github.com/brains-and-beards/graphql-server
https://github.com/brains-and-beards/react-native-graphql-app
References
Want more?
If you liked this post, why don't you subscribe for more content? If you're as old-school as we are, you can just grab the RSS feed of this blog. Or enroll to the course described below!
Alternatively, if audio's more your thing why don't you subscribe to our podcast! We're still figuring out what it's going to be, but already quite a few episodes are waiting for you to check them out.


WRITTEN BY


More Brains and Beards stories


If you're a bit of a technical nerd (like us!) you can keep on reading. This site has been built in React, using GatsbyJS. The data layer is managed through GraphQL. The whole thing is hosted using Netlify. All of those products are great and we're so happy to be able to use them 💯❤️🚀