November 27, 2018
Part 1 - Setting up a GraphQL Server with Prisma


In this blog series, I’m going to be focusing on Getting Started with GraphQL and React Native. Before we start building anything, if you haven’t used GraphQL before, I recommend some primer material on GraphQL. Head over to the official GraphQL documentation here.
Folder Structure
Let’s get started by setting up the following directory structure:
|-- database
 |-- datamodel.graphql
 |-- prisma.yml
|-- src
 |-- index.js
In my example, I will be using graphql-yoga by Prisma to setup the GraphQL server. It’s a full-featured GraphQL Server, which contains all the most important features to help setup your server.
From the root directory of your project’s workspace, run the following commands in the terminal:
$ yarn init -y

$ yarn global add graphql-cli

$ yarn add graphql-yoga prisma prisma-binding
Update the scripts in your package.json to the following:
"scripts": {
 "start": "node src/index.js"
}
Type Definitions and Resolvers
A GraphQL service is created by defining types and fields on those types, then providing functions for each field on each type. More info.
Let’s create some type definitions and resolvers. In my example, I created a Query type which has one field called dogName that must return a String.
Paste the following code into your src/index.js file. We’ll do a simple test to validate our GraphQL Server is operational and working correctly.
const { GraphQLServer } = require('graphql-yoga')const typeDefs = `type Query {dogName: String!}`const resolvers = {Query: {dogName: () => `Tommy the chihuahua`,},}const server = new GraphQLServer({typeDefs,resolvers,})server.start(() => console.log(`Server address: http://localhost:4000`))
Once done, run the following command to start the server:
yarn start
For the purposes of this demo, the server should be listening on port 4000. Once the server has started, navigate to http://localhost:4000 in your browser. You should be presented with the GraphQL playground.
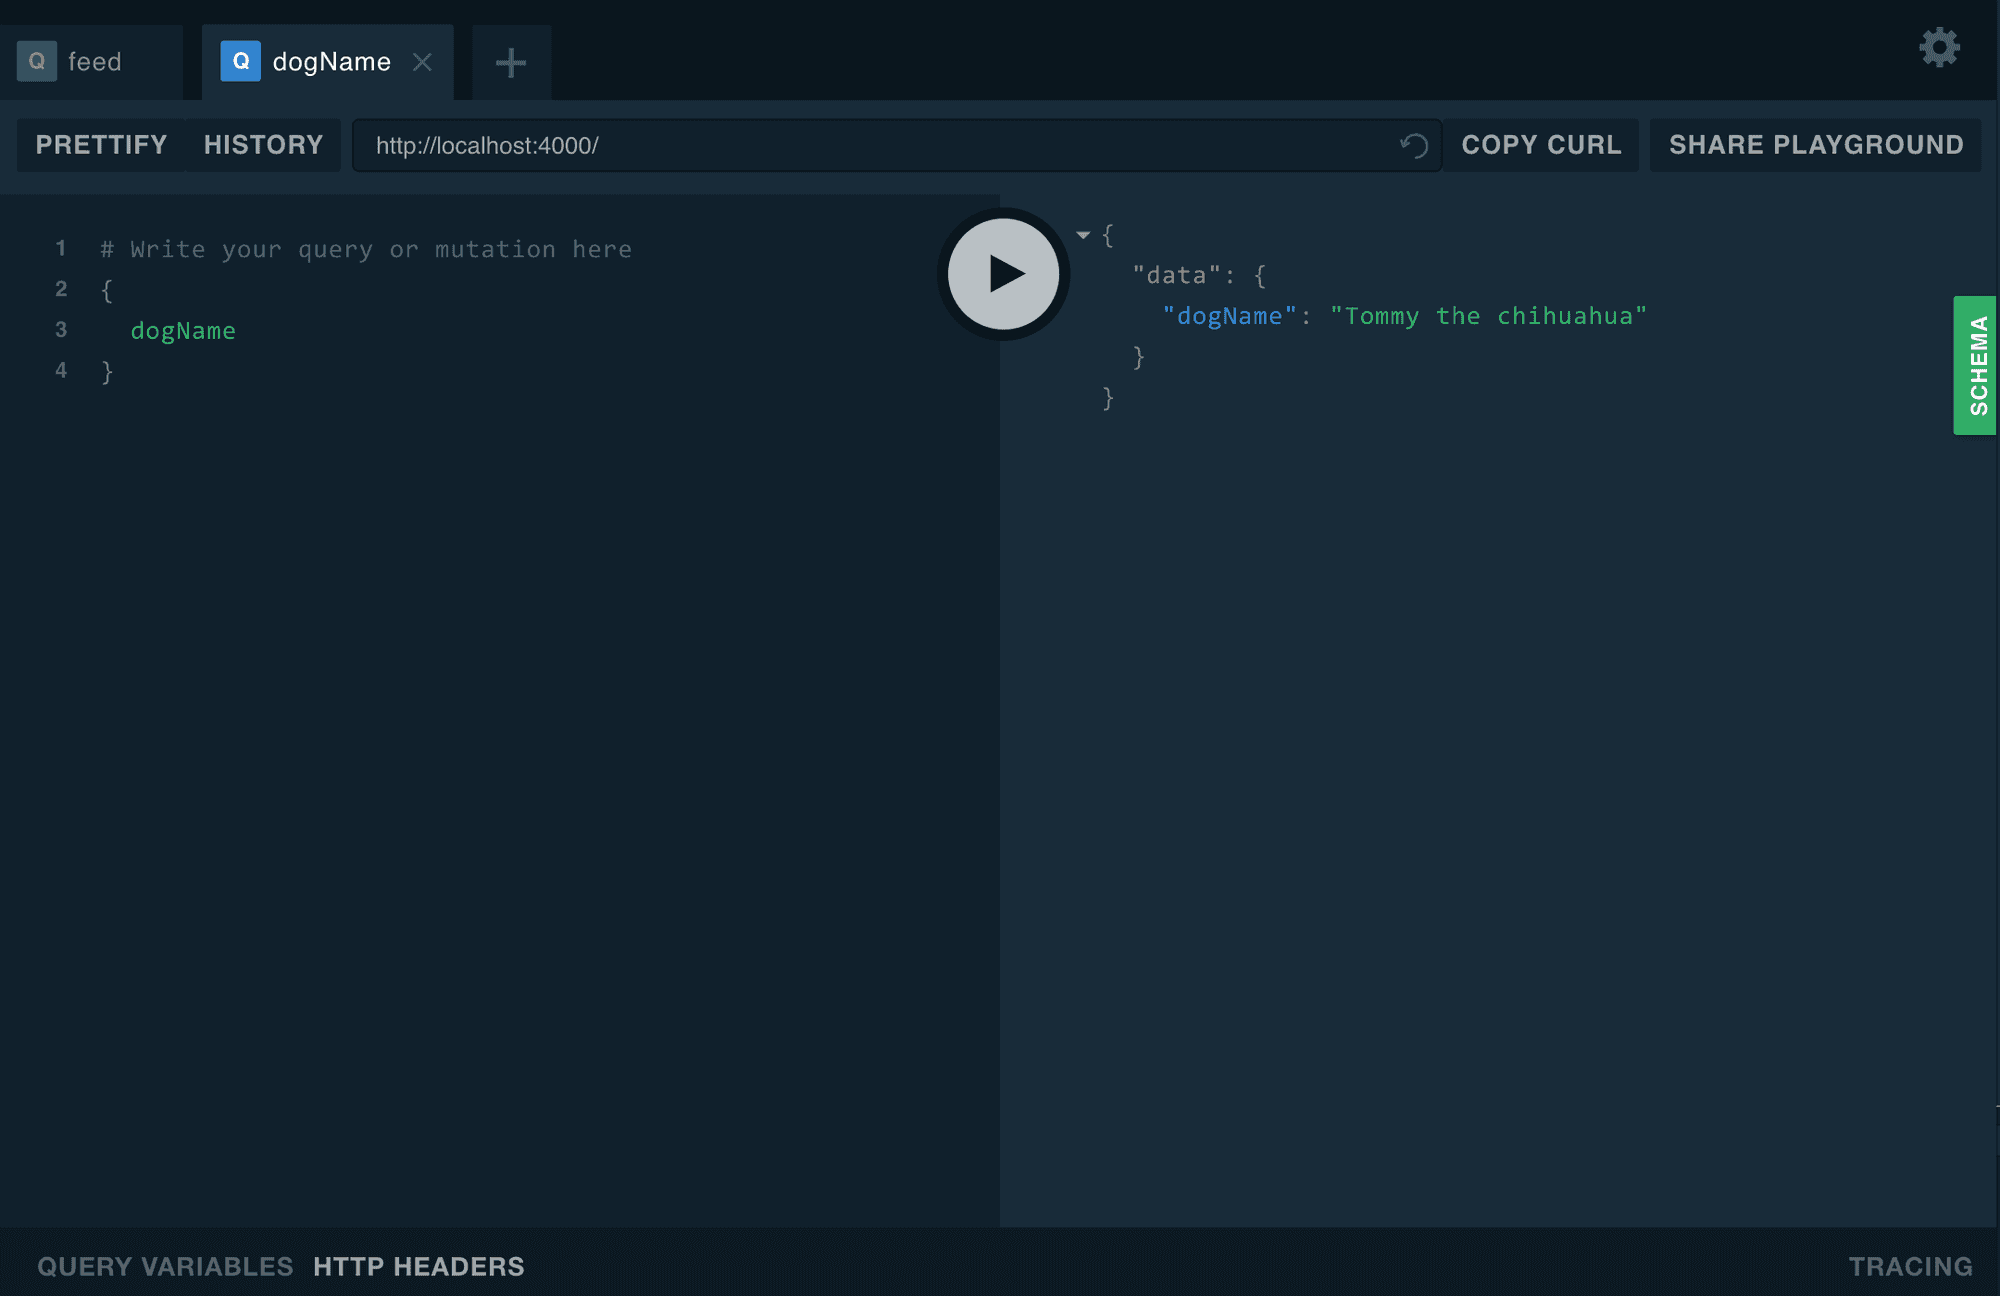
Let’s test the server by querying our dog’s name. Enter the following query on the left-hand side of the playground:
{
 dogName
}
Run the query by pressing the play button. If done correctly, you should see a JSON response with our dog’s name in the payload on the right-hand side.
Configuring Prisma
Great! Our GraphQL Server is working. Let’s get things set up with Prisma.
Prisma provides a set of APIs to help you connect your GraphQL API to your database without having to worry about all the CRUD boilerplate.
Add a Dog type to the datamodel.graphql file you created earlier:
type Dog {id: ID! @uniquename: String!type: String!}
Now let’s set up the configuration file for Prisma. Open the prisma.yml file you created earlier and change it to the following:
# Prisma API HTTP endpointendpoint: ''# Data model file namedatamodel: datamodel.graphql# API access secretsecret: testsecret
Now that we’ve set up a basic data model and configured our Prisma service, let’s test a deployment. From the root of your project workspace, enter the following commands in your terminal:
$ cd database$ prisma deploy
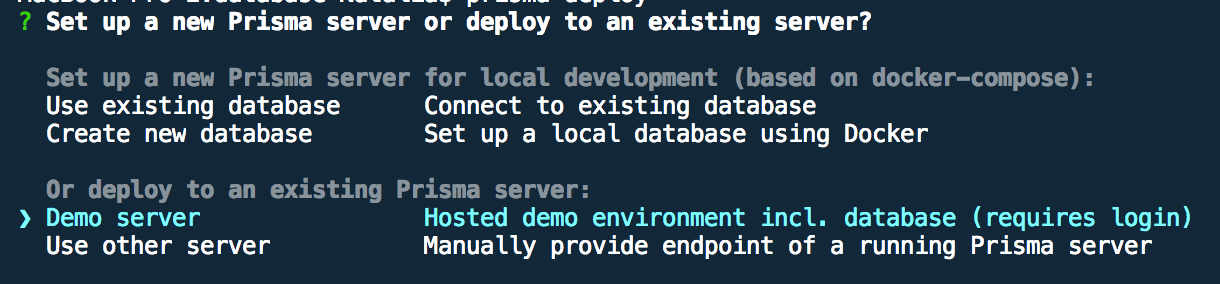
For the purposes of this example, select Demo server from the deployment options. Your browser should open, taking you to the Prisma website. You will be prompted to set up an account in Prisma and then answer a few questions about your Prisma database in the terminal.
If you’ve already got an existing Prisma account with an operational server, you can select
Use other server
After completing the setup above, the prisma.yml file will have been updated with the new endpoint URL. Before we can use this endpoint, we need to generate an authorization token. This authorization token will be used to authenticate each request made to the Prisma API. Run the following command from the terminal:
$ prisma token
In your browser, navigate to the endpoint shown in the prisma.yml file. The GraphQL playground for your server should appear. Copy the generated token into the authorization field via the HTTP Headers tab.
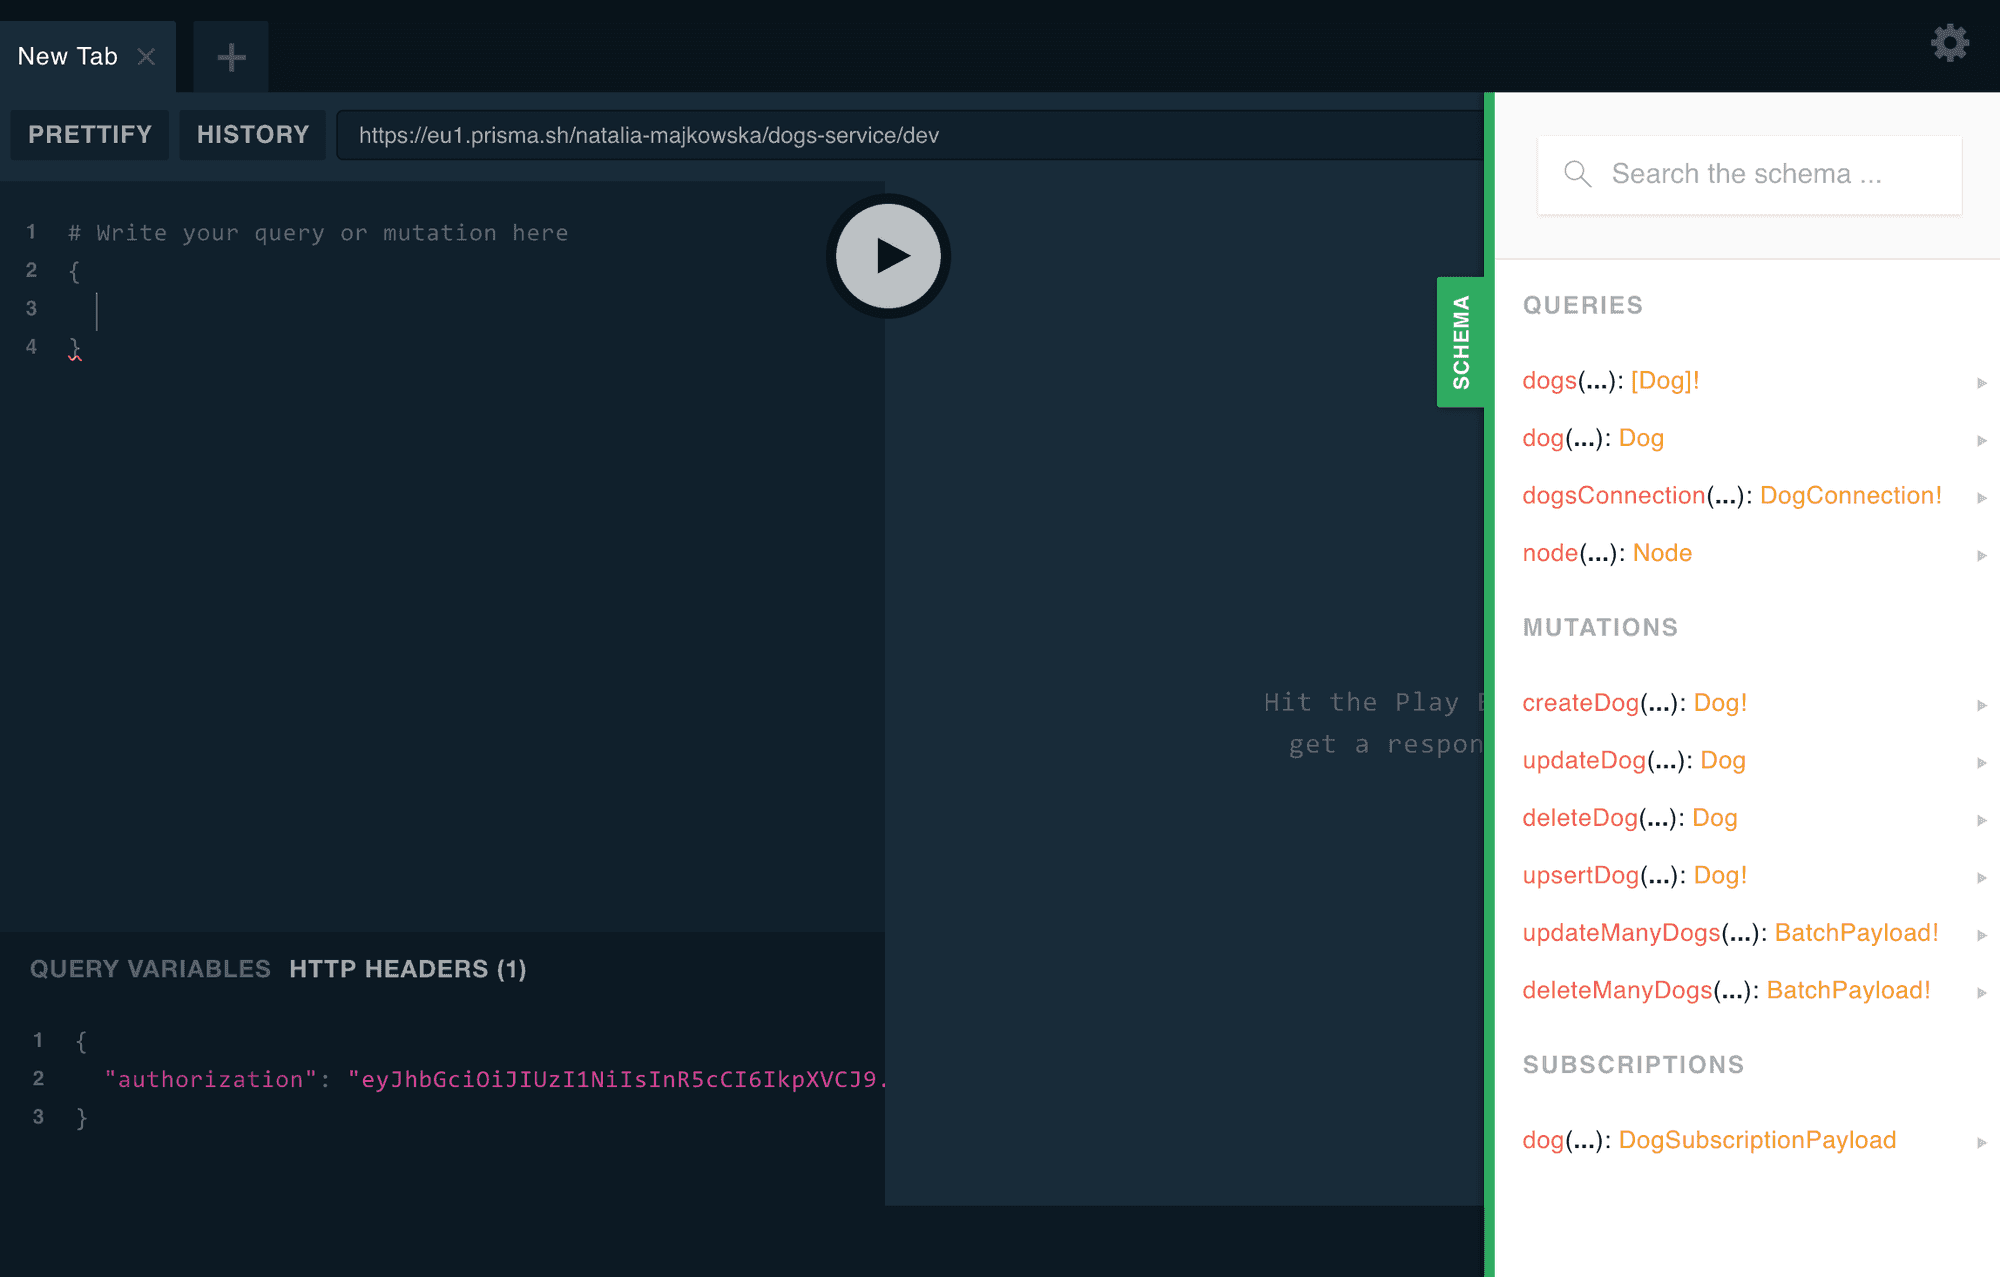
To check if the token is valid, click the Schema button on the right. The example GraphQL schema should appear on the right.
Mutations
If you have everything working, let’s add a dog to our database. To change data in a database via a GraphQL API, we use what’s called a mutation. Copy the following mutation into the GraphQL playground:
mutation {createDog(data: {name: "Tommy",type: "Chihuahua"}) {id}}
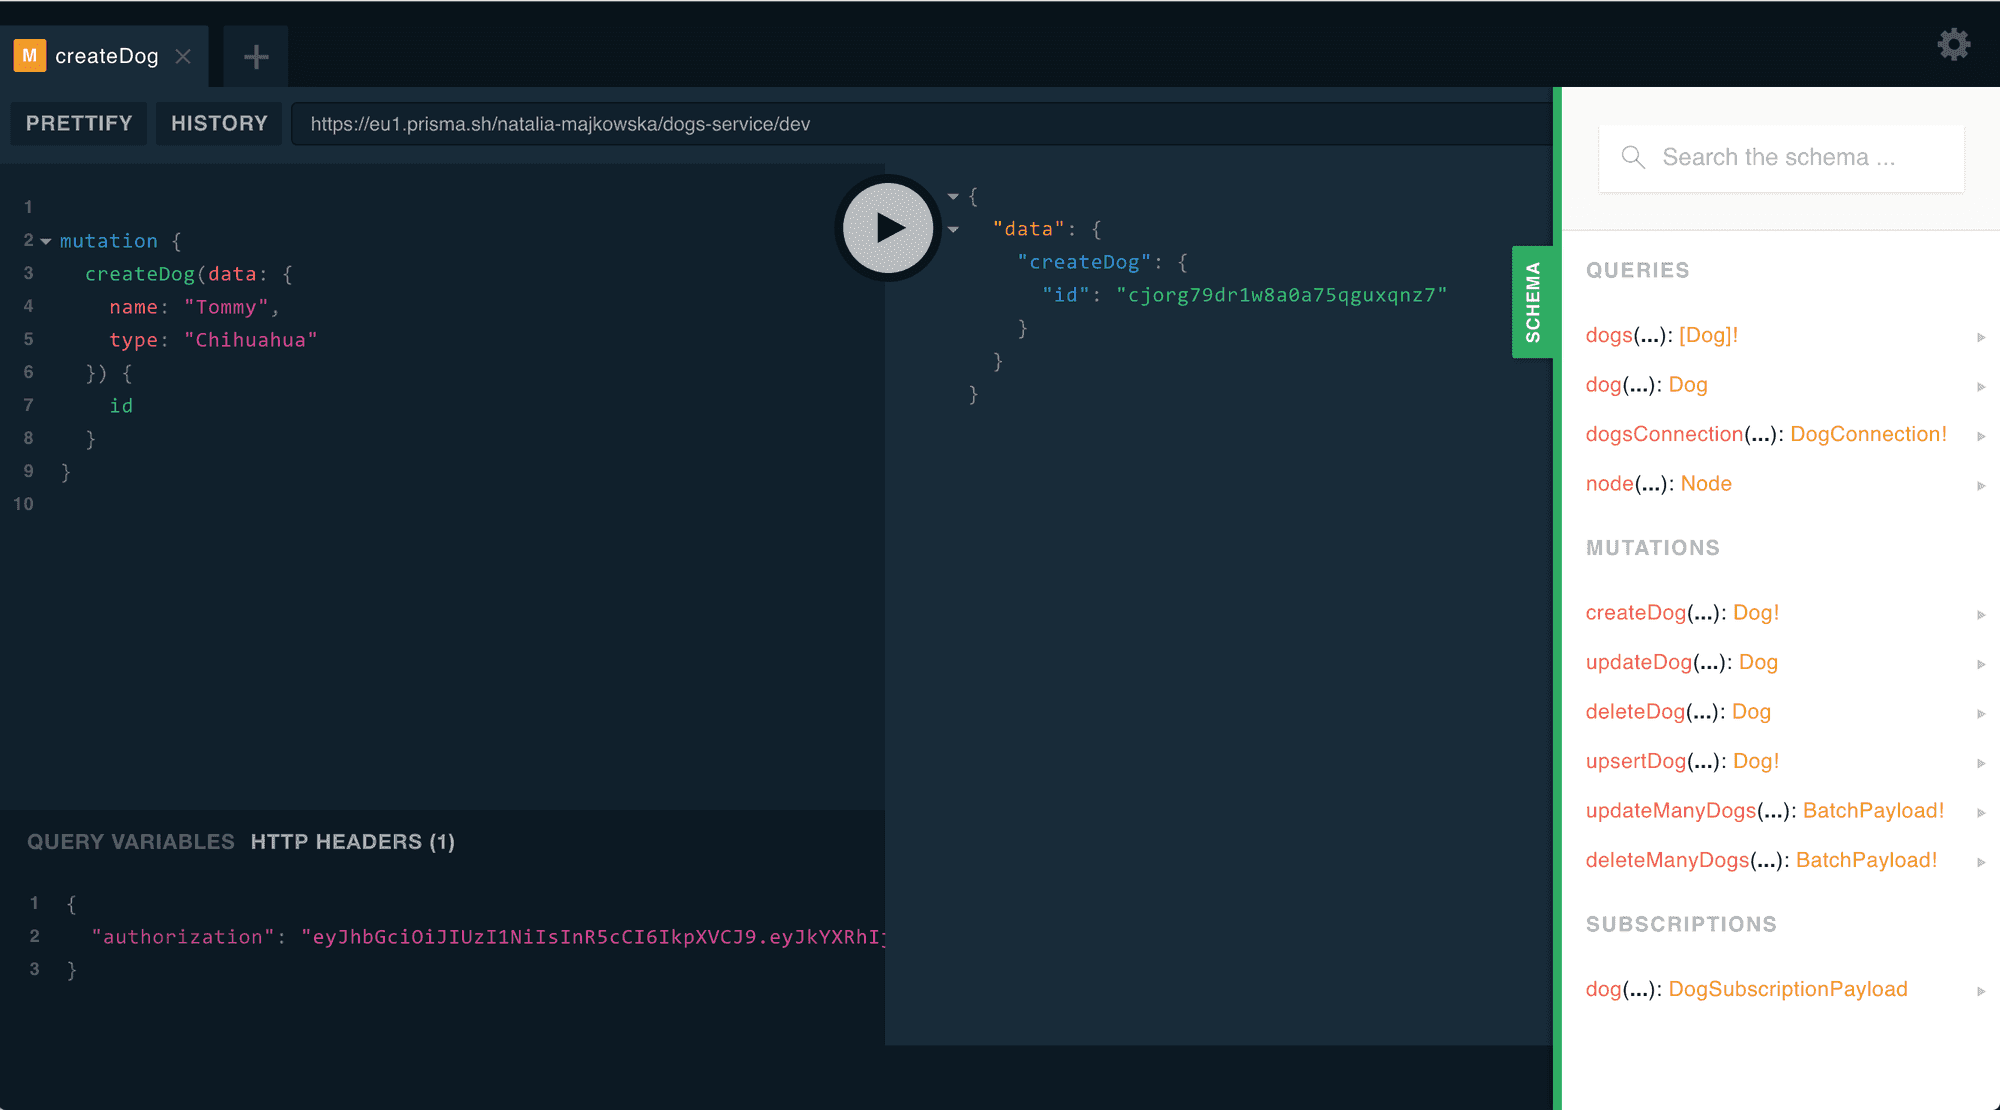
Hit the play button, and if everything works correctly, a Dog object will have been added to the database. Our mutation returns the id of the created Dog, which is shown on the right-side of the GraphQL playground.
Queries
Let’s verify that our new dog exists in the database by running a query. Copy the following query into the GraphQL playground:
query {dogs{id,name,type}}
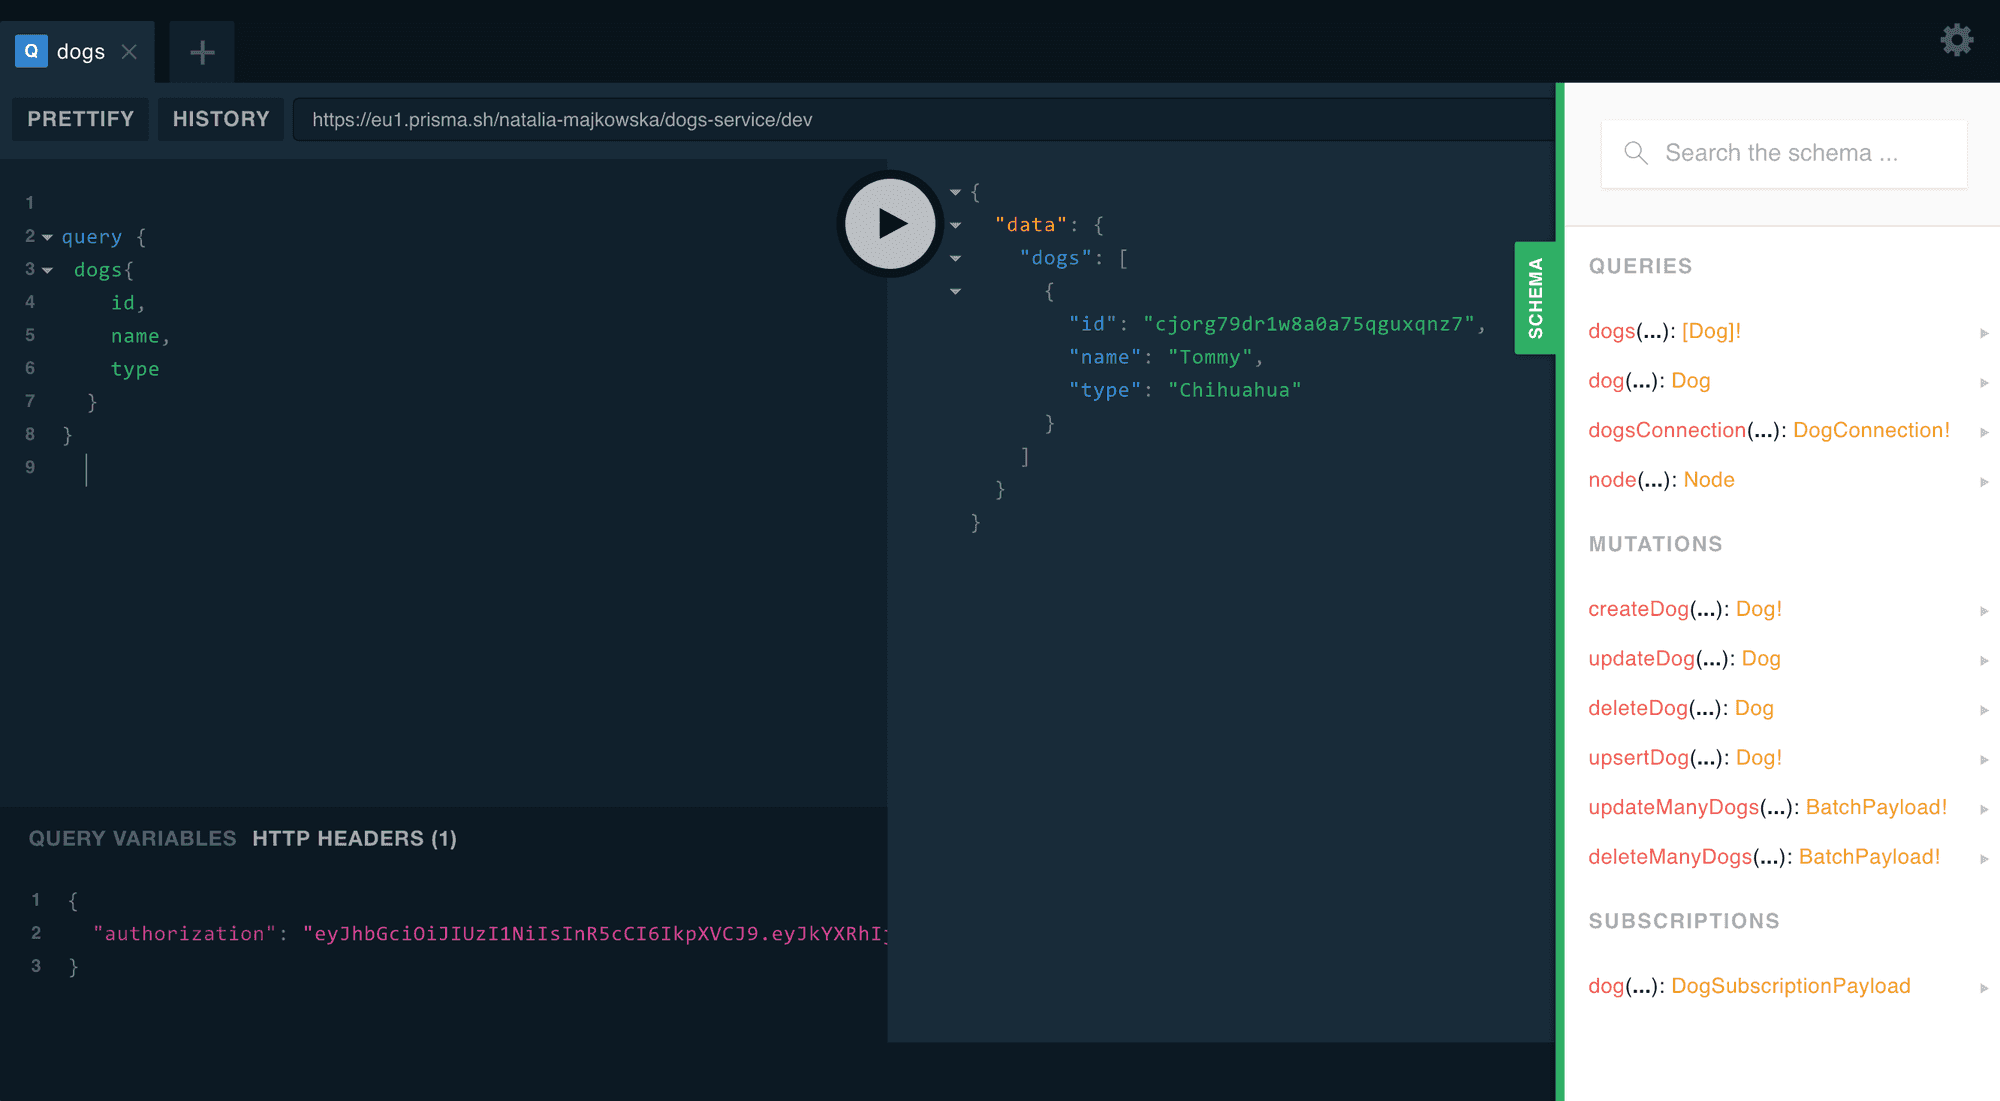
An array of dogs will be returned. You should see the dog you just created.
Connecting Resolvers to the Prisma API
The last step of this tutorial will be connecting our GraphQL resolvers to the Prisma API. We will use the prisma-binding library to do this.
Resolvers are functions that map to fields in your GraphQL Schema. Resolvers provide instructions for turning a GraphQL operations into data. More info.
Open the index.js file change it to the following:
const { GraphQLServer } = require('graphql-yoga')const { Prisma } = require('prisma-binding')const typeDefs = `type Query {dogName: String!}`const resolvers = {Query: {dogName: () => `Tommy the chihuahua`,},}const server = new GraphQLServer({typeDefs,resolvers,context: (req) => ({...req,db: new Prisma({typeDefs: 'src/generated/prisma.graphql',endpoint: 'YOUR_ENDPOINT_PATH',secret: 'testsecret',debug: true,}),}),})server.start(() => console.log(`Server address: http://localhost:4000`))
All we did above was create a Prisma binding instance and attach it to the context of the GraphQL Server. Now it’s time to adjust the resolvers. Update your index.js file to the following:
const { GraphQLServer } = require('graphql-yoga')const { Prisma } = require('prisma-binding')const typeDefs = `type Query {dogName: String!}`const resolvers = {Query: {dogName: () => `Tommy the chihuahua`,dogs: (root, args, context, queryInfo) => {return context.db.query.dogs({}, queryInfo)},},Mutation: {dog: (root, args, context, queryInfo) => {return context.db.mutation.createDog({data: {type: args.type,name: args.name,},},queryInfo)},},}const server = new GraphQLServer({typeDefs,resolvers,context: (req) => ({...req,db: new Prisma({typeDefs: 'src/generated/prisma.graphql',endpoint: 'YOUR_ENDPOINT_PATH',secret: 'testsecret',debug: true,}),}),})server.start(() => console.log(`Server address: http://localhost:4000`))
Our resolver functions will now execute the appropriate binding functions of the Prisma binding instance.
Before we can test this, we need to create a GraphQL Schema. In the project’s src directory, create a file called schema.graphql. Declare the following types inside:
type Query {dogName: String!dogs: [Dog!]!}type Mutation {dog(type: String!, name: String!): Dog!}type Dog {id: ID!type: String!name: String!}
In the index.js file, replace the typeDefs path for the Prisma binding instance with ‘src/schema.graphql’
const server = new GraphQLServer({typeDefs: 'src/schema.graphql',resolvers,context: (req) => ({...req,db: new Prisma({typeDefs: 'src/generated/prisma.graphql',endpoint: 'YOUR_ENDPOINT_PATH',secret: 'testsecret',debug: true,}),}),})
Everything is looking good but we’re missing two last pieces. So before the GraphQL Schema can be generated correctly, we have to create a .graphqlconfig.yml file and add a reference the Prisma database schema. Create a .graphqlconfig.yml file in the root directory of your project’s workspace, and paste the following:
projects:app:schemaPath: src/schema.graphqlextensions:endpoints:default: http://localhost:4000database:schemaPath: src/generated/prisma.graphqlextensions:prisma: database/prisma.yml
For the end, edit also database/prisma.yml adding following code:
# Deploy hookhooks:post-deploy:- graphql get-schema --project database
Deploying to Prisma
Run the following to deploy and synchronise all your service definition and data model changes with the remote Prisma service, make sure to run it from the root project:
$ yarn prisma deploy
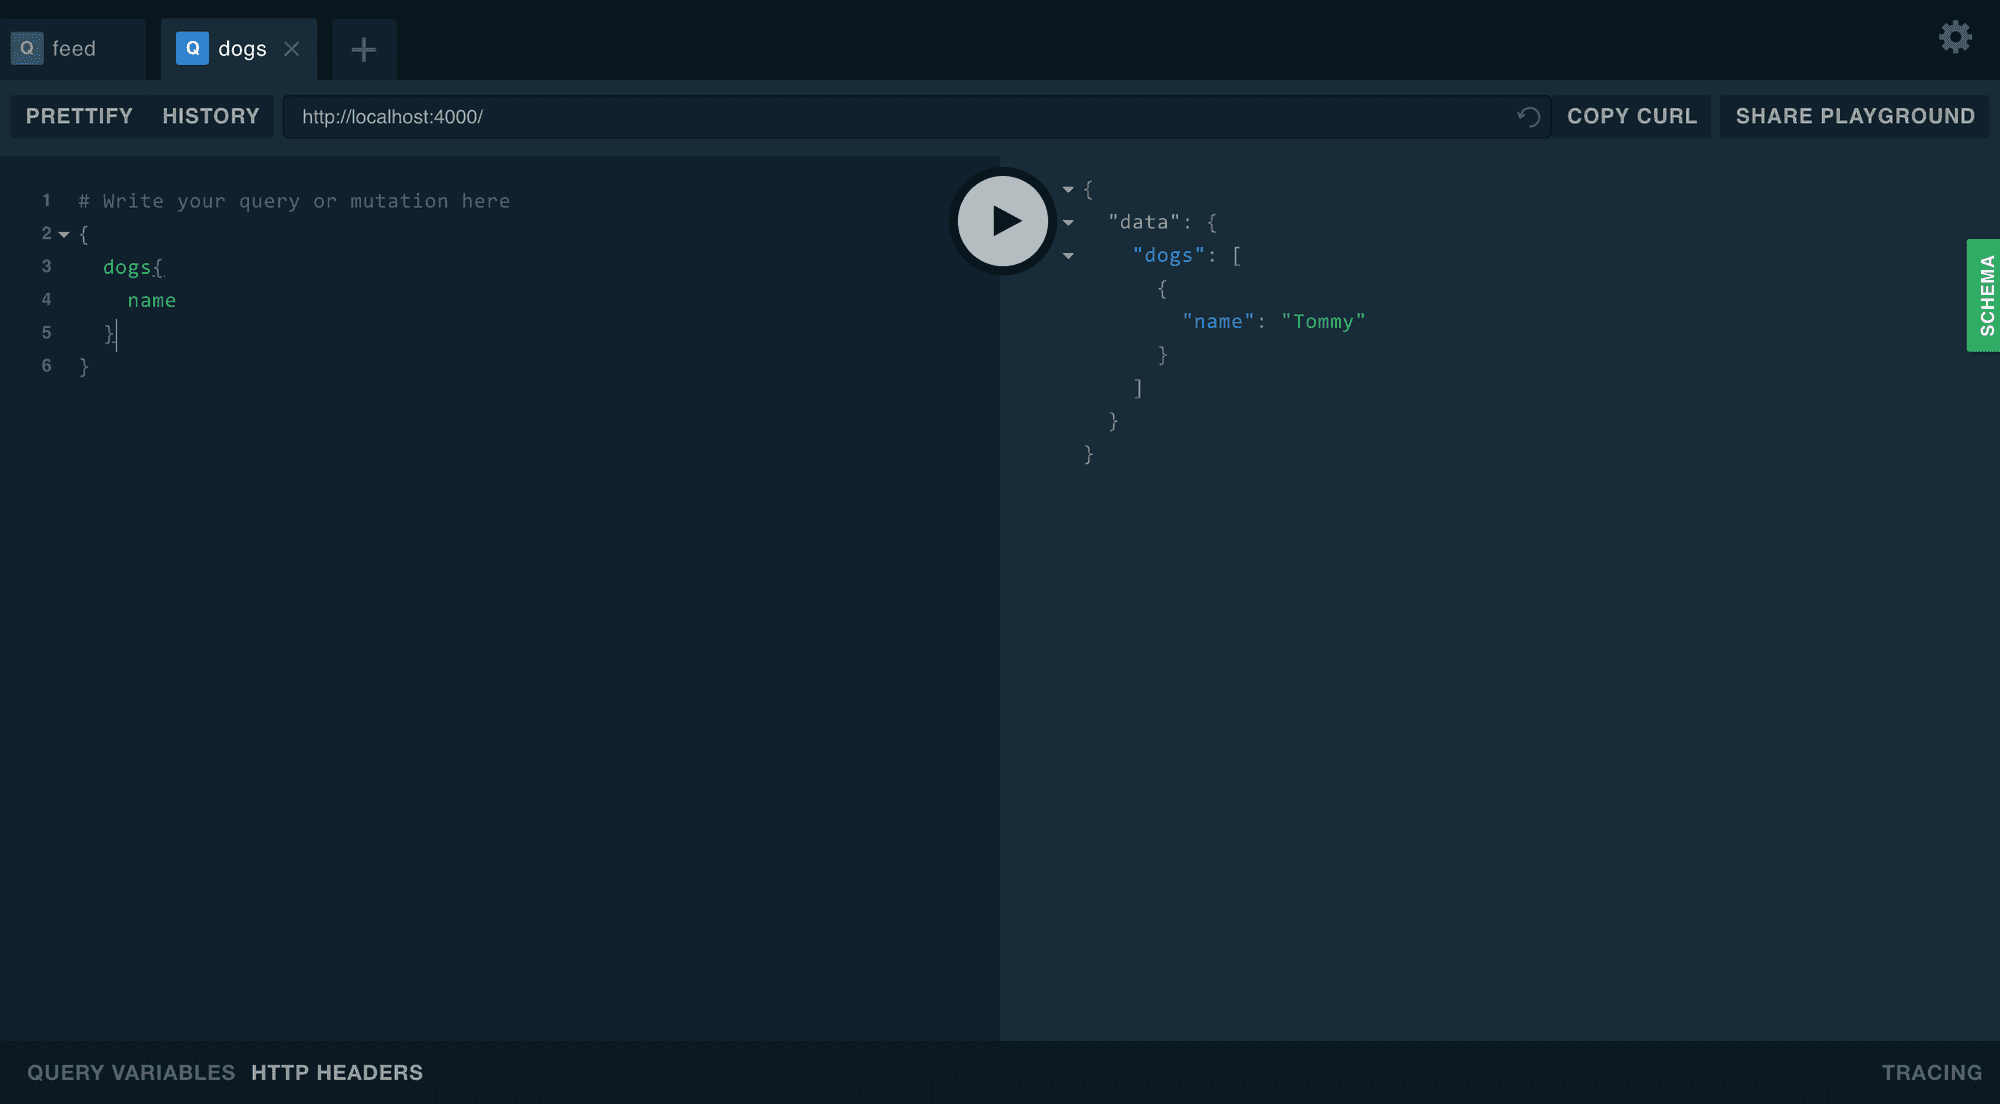
Restart your GraphQL server and navigate to http://localhost:4000. Verify that you can execute queries to your GraphQL server, similar to the one shown below:
Source Code
https://github.com/brains-and-beards/graphql-server
References
Want more?
If you liked this post, why don't you subscribe for more content? If you're as old-school as we are, you can just grab the RSS feed of this blog. Or enroll to the course described below!
Alternatively, if audio's more your thing why don't you subscribe to our podcast! We're still figuring out what it's going to be, but already quite a few episodes are waiting for you to check them out.


WRITTEN BY


More Brains and Beards stories


If you're a bit of a technical nerd (like us!) you can keep on reading. This site has been built in React, using GatsbyJS. The data layer is managed through GraphQL. The whole thing is hosted using Netlify. All of those products are great and we're so happy to be able to use them 💯❤️🚀